Some things just really brighten up my day. Bubble tea's one of them (aka boba tea, aka pearl tea). They are such a fun drink, and frankly, the little black pearls serves as a big influence. They are highly overpriced, I'd say. But they are super easy to make, so let's make some Thai Bubble Tea together.
Base: Thai Tea
Boba (tapioca pearls) Flavor: Condensed milk
Sugar (optional) Heat: Boil 1. Boil water and seep Thai tea leaves/bags
- Tip: just like any other type of iced tea, you will want to prepare a stronger brewing.
2. Let tea cool
- Tip: prepare step 1 ahead of time. 3. Cook tapioca pearls
- Refer to package instructions as a guide. Usually takes 5+ minutes to cook. 4. Drain tapioca pearls
- Tip: add sugar to the tapioca pearls, mix, and let cool.
- Tapioca pearls are bland. When sipped with sweetened tea concurrently, the sweetness in the tea will be undeniable, but it does not permeate into the pearls. By adding a little sugar to the pearls after cooking it in water, the sugar will dissolve into the pearls and give them a little lift in flavor-- not overpowering that they become candy-like, but subtle and just right.
5. Assemble iced tea
- Add tapioca pearls into glass of tea (amount contingent upon your liking).
- Add ice.
- Sweeten with condensed milk, 2-3 tbsp. more of less depending on your desired level of sweetness.
- Tip: if you want to avoid a condensed-milk heavy drink, add less condensed milk and incorporate sugar to the mixture.
6. Serve with a BIG boba appropriate straw for the full bubble tea experience!
- Oh yea, there's definitely a difference. My two-year-old nephew loves boba drinks. He loves catching boba in the big straws, and he gets so excited when he sips one in his mouth. He pauses, points to the his mouth and says "BOBA!" Fun stuff.
* Notes: this recipe is so forgiving, you can easily change any amount of the ingredients to adjust to your personal preferences. And as always, I encourage you to do so. Enjoy, and make sure you have fun in your kitchen!
Watch a demo of this recipe and join me in my kitchen where everything is served with love.
Eggs are a sample in my fridge. I like to keep frozen peas and frozen shrimp on hand. Together, I can make shrimp fried rice on days when I have extra rice, or I want to make a easy and delicious meal, or just when I crave shrimp fried rice! It's a great way of always having a fall-back meal when grocery shopping is needed, but cannot be completed. Whenever I make shrimp fried rice as an impromptu meal, I may not always have onions available; although onions add more flavor, it tastes fine without it!
Base: 1/2 lb. shrimp, thawed, peeled, and deveined
Rice (cook 1 1/2 cups rice) Flavor: 1/4 onion, diced
2 large eggs, whisked
1/2 cup frozen peas, thawed
Salt, pepper, and soy sauce to taste
~ 4 tbsp. oil, or as needed Heat: Stir Fry
1. Cook shrimp until 90% through in toaster oven
- Benefit: saves time. While the shrimp is cooking itself, work on the other stuff.
2. Saute onions in wok (or big frying pan) with ~ 3 tbsp. oil
- Medium-ish heat for ~ 1 minute is ideal.
3. Add rice
- Tip: increase heat by a notch or two to welcome the cold/room temperature rice.
- Tip: break up big clumps of rice with spatula to prevent big chucks of rice from sticking together.
- Stir fry for ~ 1-2 minutes, add oil if necessary.
4. Pour eggs into rice and stir!
- Tip: stir fry constantly if you want the eggs well incorporated into each grain of rice and achieve that "golden-rice" look.
- Stir fry until eggs are well incorporated, add oil as neccesary.
5. Add peas and shrimp
- How convenient! The shrimp is ready when everything else is ready for the shrimp! Thumbs up to multitasking :)
6. Flavor with soy sauce, salt, and pepper
- More soy sauce and salt if you like it salty; less if you don't want to be friends with sodium.
- Tip: if you are trying to achieve that "golden-rice" look, compensate extra salt for less soy sauce, as the dark color of soy sauce deters a golden finished look.
- Stir fry until flavors are all incorporated, and the peas and shrimp are cooked through.
- Optional: garnish with Sriracha (Asian hot sauce).
- Tip: if portion control is a virtue of yours, and you have leftovers for the next day, add a small splash of water over the rice before reheating. The fried rice gradually looses moisture and will become more dry the next day. Adding a small splash of water while reheating will ensure the same fresh taste as it was yesterday.
* Notes: avoid using soggy or even slightly soggy rice (it will get mushier and stickier as you stir fry). With that said, it's best to use rice cooked with just enough water (not perfect, just not remotely soggy). Left over rice is a good option, and a good way to make use of it. Freshly cooked rice is also a good option, but make sure that it has been cooled down before stir frying. Because life's not always perfect, if the rice that you are using happens to be slightly soggy, use a little extra oil while stir frying, and aim to stir fry for a shorter amount of time.
As always, I encourage you to change any part(s) of this recipe to reflect your personal perferences. The amount of shrimp I use is signficantly more generous compared to the amount given when you order out-- you may add more or less to satisfy your liking. If you don't like or don't have onions, substitute a clove of minced garlic, or omit the onions and/or garlic! Just don't deviate too much-- neglecting to thaw the frozen peas will result in a hot fried rice dish with cold peas! Whatever you do, make sure you have fun in the kitchen!
Watch a demo of this recipe and join me in my kitchen where everthing is served with love.
How can I thank you enough? I started my YouTube channel (LetsGetCookinggg) to share what I know best and what I love dearly with everyone: food and cooking. I love to eat, and I love to cook. I eat a lot, and I cook a lot. Basically, my life revolves around food. I wanted to share what I have learned about food and cooking with beginner cooks to demonstrate how easy it is to cook, and hopefully help advanced cooks discover new tricks/tips/suggestions. And for those who don't cook, a chance to see how food can be cooked, or just watch me look silly on camera :)
Every time I have a new subscriber, it makes me happy and all giddily inside to know that a new person is following and supporting my videos. I also appreciate it when my viewers take the time to comment on my videos, thumbs up my videos, favorite my videos, etc,. I recently reached 100 subscribers and I feel so grateful for all of your support! It has been an incredible experience connecting with everyone from a diverse background and from all over the world! Thank you for this opportunity!
As a token of my gratitude, I would like to offer a giveaway. I want to give something thoughtful, something useful, something I love, and something everyone (or almost everyone) can relate with. A few things fit my demanding requirements:
1. Seasoning & Spices. If you are new to cooking, what a nice start up collection this would
make! If you already have a collection, you can be ready to restock when
the time comes. If you don't cook, you can gift this to the person who
cooks for you wink * wink ;) I use all of these in my kitchen, and they are my favorites. I have a couple of other favorites but the store ran out of them. I brought these from Sprout's Farmer's Market (formerly Sunflower Farmer's Market). They have multiple sets of product ID #s for each seasoning/sprices, and I happened to guessed the wrong set. Oops! The products were in no way effected by my boo boo, except for the labels on each of the seasoning/spices-- they have 2 sets of product ID #s, one of which were crossed out by me and the cashier. It didn't look so neat or pretty anymore, so I covered the wrong product ID #s with stickers. That is why there are random stickers that say: WOW, Fantastic, Terrific, Way to Go, Cool, etc,. Just so ya know :)
2. Plastic gloves. I constantly talk about how awesome plastic gloves are around the kitchen. I thought I would throw in a pack of those too.
3. Hello Pandas. I have a super sweet tooth. My boyfriend says that's an understatement, it's more like a super sweet mouth. Anywho, I like to share what I love, and 90% of the time when I give a present, I always add a sweet treat on the side. It's like my signature gesture; a gift without sugar on the side is not a gift from Yen. So that explains the Hello Panda snacks :)
Giveaway rules:
1. Must be a subscriber to my YouTube channel. If you are not yet a subscriber, subscribe now!
2. Must be 18 or older, or have parent's permission
3. Like my facebook page: www.facebook.com/LetsGetCookinggg
- or follow my blog: LetsGetCookinggg.blogspot.com
- completing one of the two will grant you 1 entry, completing both will gain you 2 entries
4. Comment on my giveaway video and let me know if you have liked my facebook page, followed my blog, or both, and include your user name for each.
5. Giveaway is open to everyone! As long as the United States Postal Services (USPS) will ship it to you, I will have it shipped to you!
6. Giveaway ends October 8, 2012 @ 12AM EST.
7. Winner will be randomly selected by random.org.
8. Winner will be notified via personal message from my YouTube username: LetsGetCookinggg. Winner will have 1 week to respond or else a new winner will be chosen.
Good luck! I wish everyone can win, but last time I checked, I'm not a millionaire... yet. Someday? Again, thank you so much for all of your support! It means a lot to me, and I appreciate you all!
I shared my Tzatziki (White Yogurt Sauce) recipe in a previous post. You know what goes great with it? Chicken Kabobs (Chicken Skewers, Chicken Souvlaki, etc). Here's how I make it!
Base: 6 skinless chicken breasts, cut into 1-inch cubes
2 zucchinis, cut into 1/4-inch-thick slices (smaller or bigger depending on your personal perference)
2 yellow squash, cut into 1/4-inch-thick slices (smaller or bigger depending on your personal perference)
1/2 onion, cut into 1/2-inch squares (smaller or bigger depending on your personal perfernece) Flavor: 1 tsp. crushed red pepper
1 tsp. oregano
1/2 tsp. ground thyme
Salt and pepper to taste
1 tbsp. oil Heat: Grill
1. Soak skewers
- Tip: submerge skewers in water for 30+ minutes to prevent skewers from burning on the grill.
2. Combine all ingredients in a large bowl and mix
- Tip: use a plastic glove so your bare hand(s) won't have to touch the raw and slimy chicken!
3. Assemble ingredients on skewers
- Have fun with it and assemble them in whatever order you desire.
4. Grill the food
- On medium-ish heat, cook covered for 3 minutes.
- Rotate, cover, and cook 3 minutes.
- Rotate, cover, and cook an additional 3 minutes, or until chicken is cooked through.
Suggestion: serve with pita, bread, or rice. Suggestion: must try with Tzatziki Sauce. Try my Tzatziki recipe here
Have extra veggies? Cook them on the side, and lightly season with salt, pepper, and oil. Optional: add same seasoning used in the chicken mixture (these extra veggies were not mixed into the chicken).
* Notes: pre-assembled chicken kabobs are prevalent at most grocery stores. They offer the convenience of not having to do the prep work yourself. I agree that it's much easier to buy them already prepared, and only have to take care of the grilling part at home. However, whenever I see the pre-assembled chicken kabobs at stores, the discoloration of the meat and veggies make me wonder how long they have been sitting in the refridgerated display cases. On top of that, I can't recall ever seeing a customer buy them, which makes me wonder how long it takes to cycle out each pre-assembled batch. Home made ensures freshness and the flexibility to choose your own flavors and ingredients. Picture 1 reflects freshness. This is a dish where I would choose to do the prep work myself and forgo convenience for freshness. * More Notes: I like my veggies tender. For that reason, I cut them smaller and thinner in comparsion to the size of the chicken. As always, I encourage you to change any part(s) of this recipe to reflect your personal preferences. If you fancy 3 full onions for this recipe, please fulfill your tummy's desire. Just don't deviate too much-- neglecting to soak your skewers will result in very blackened or burnt skewers. Whatever you do, make sure you have fun in your kitchen!
Watch a demo of the recipe and join me in my kitchen where everything is served with love.
I like to cook, but I also like to go out to eat. A lot! I want to share one of my highly anticipated events that only comes around once a year. It's the Greek Festival in Salt Lake City! I LOVE to go for the food-- of course, but I'm not the only one (the following pics were taken last year)...
The people sitting down already have their food, and the people standing up are waiting in the ridiciously long line to get their hands on some food. The view from my camera reflects the position where I was standing in line: very far away. The cooked food is situated behind the cluster of doors which seems so far away. Wouldn't it be nice to be able to create a portal and be transported through the doors instantaneously?
Getting closer...
There we are! Side note: this is exactly what I meant in my previous blog post-- there's never enough Tzatziki (White Yogurt Sauce) with your Greek food order. I want more than just a dollop! Check out my previous blog post here to see how you can make your own Tzatziki Sauce at home.
Can't forget about dessert. My boyfriend and I asked the cashier which three were her top three choices; the recommendations became our choice of dessert. We loved them all! I especially liked the Galotopita, with the custard filling and phyllo crust. Yum!
Upon the conclusion of last year's event, I've been waiting oh so patiently, and the Greek Festival is finally here again! Admission is $3 per person, but you can get a coupon for free admission here, brought to you by Zions Bank. Coupons are awesome. Free is awesome! The event is open September 6th-9th. I have not been yet, but there's no way I'll be missing out. I might even go twice like last year :) Enjoy!
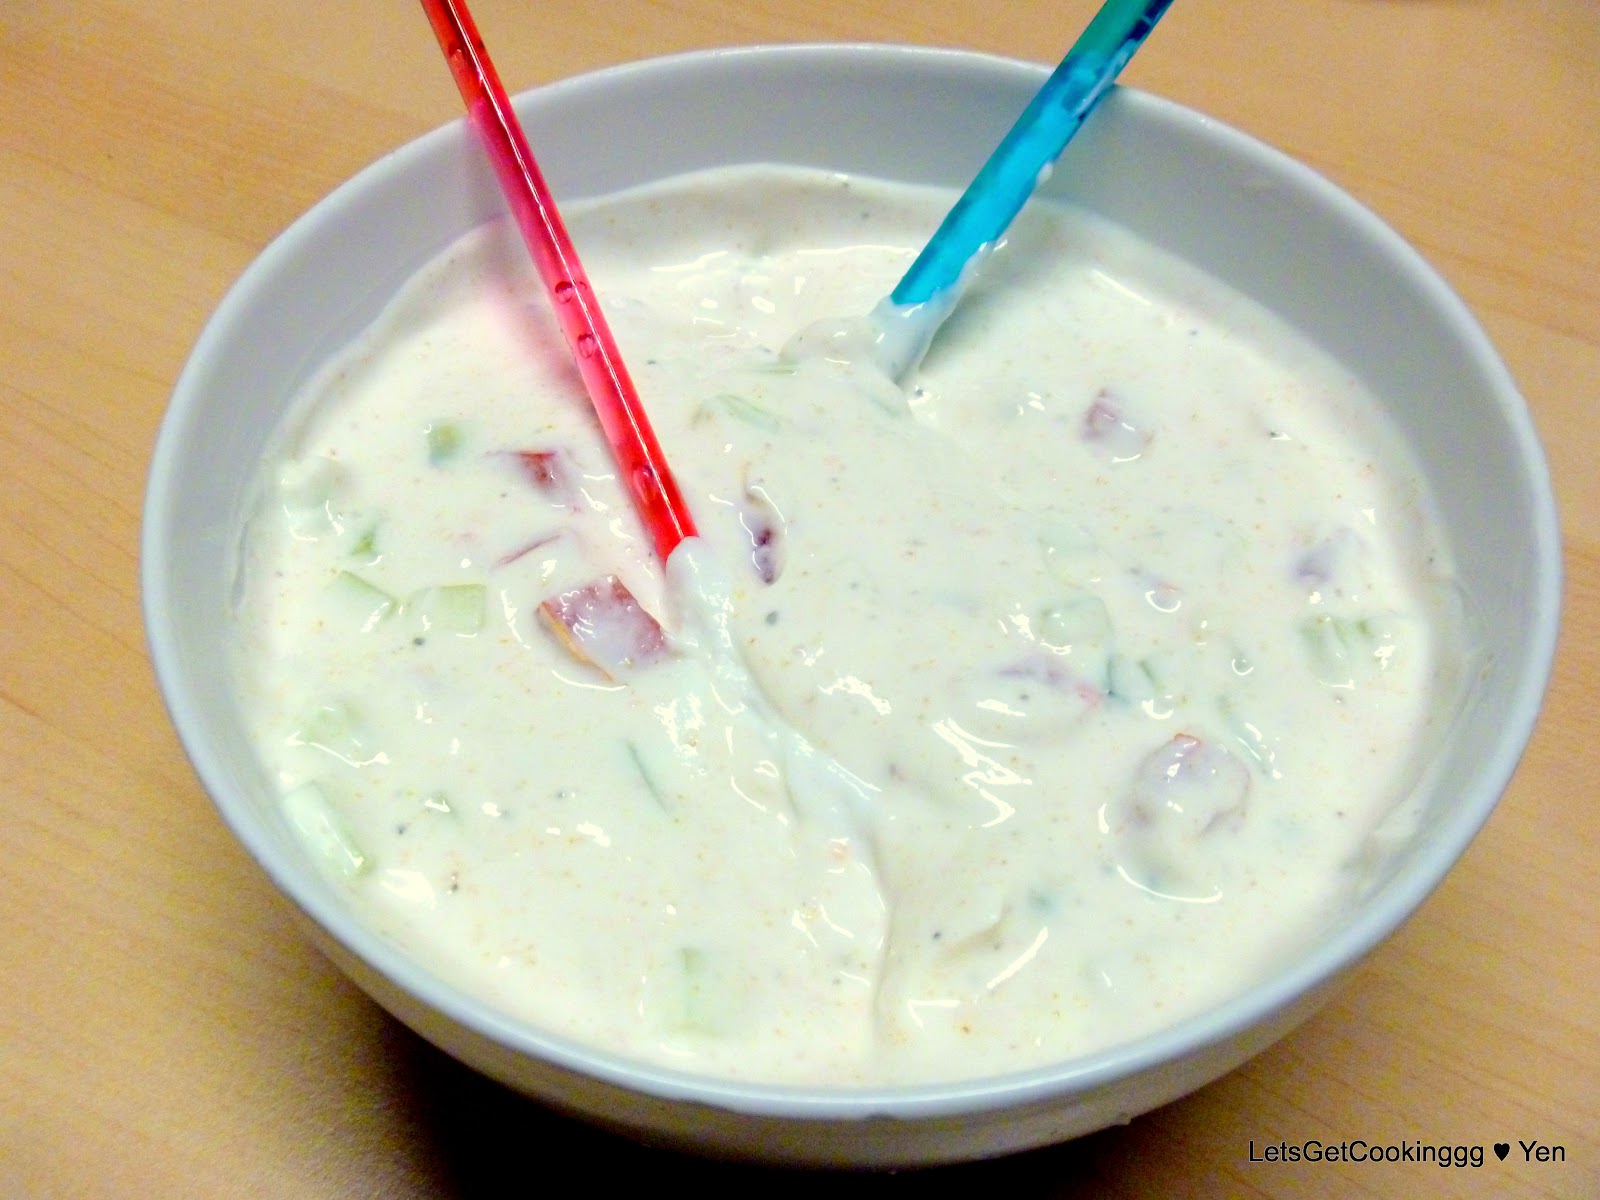
Is it just me, or does anyone else think you never get enough white yogurt sauce with your Greek food order (gyros, dolmathes, etc,)? I always have this problem. Therefore, when I make my own white yogurt sauce at home, I make lots of it! I also flavor it accordingly to make it my favorite white yogurt sauce ever. Funny thing, I rarely eat yogurt (except frozen yogurt), but I LOVE white yogurt sauce!
Pros: with the Greek yogurt I used, 1 serving (1 cup) yields 23 grams protein, 25% calcium, also completely natural-- no artificial preservatives or addidtives! I do not feel guilty eating lots of this sauce; I feel good eating lots of this sauce!
Base: 2 cups Greek yogurt (or plain non-Greek yogurt, see * Notes on bottom) Flavor: 1/2 cup diced cucumber, seeded (optional: peeled)
1/2 cup diced tomatoes, seeded
salt and pepper to taste
1 tsp. cumin
1medium-sized glove garlic, minced
1/2 lime Heat: N/A (easy stuff)
1. Combine Greek yogurt, cucumber, tomatoes, and garlic in a bowl
- Stir with a spoon or spatula.
2. Season with cumin, salt, pepper, and lime
- Tip: add a little at a time and taste as you go (because I'm a citrus girl, I used almost one whole lime, but 1/2 lime or a little more is probably sufficient for the normal person).
3. Strain sauce until ready to serve (or for next day)
* Tip: if using plain yogurt, do step 4 as step 1 and let strain over night.
- Open up a coffee filter and place it inside of a medium-mouth tall glass.
- Pull the circumference of the coffee filter up until at least 1 inch is raised above the rim of the glass.
- Fold the coffee filter down to line the outside rim of the glass.
- Wrap a rubber band around 1/2 inch down from the rim of the glass to secure the coffee filter in place.
- Spoon the prepared white yogurt sauce (or plain yogurt) into the coffee filter.
* Alternate method: use a fine sieve strainer in place of a coffee filter.
Serve with meats and/or veggies
- For best results: chill and let the flavors marry for at least 30 minutes before serving.
- Goes great with gyros, dolmathes, soulvakis, veggies, meat, etc.
* Notes: Greek yogurt is not available at all grocery stores, and it's usually more costly. Suggestion: use plain non-Greek yogurt. I always use plain yogurt, but this time, I brought my yogurt from Costco and Costco only had Greek yogurt (I guess it makes it easier for me to prepare)! If you are using plain yogurt, strain your yogurt before proceeding with the first step in this recipe. Refer to step 4 on how to strain the yogurt. And as always, I encourage you to adjust any part(s) of this recipe to flavor it according to your personal perferences. Just don't deviate too much-- neglecting to strain your yogurt will result in very watery white yogurt sauce... not a very appetizing image! Whatever you do, just make sure you have fun in the kitchen!
Watch my video to view a demo of this recipe. Join me in my kitchen where everything is served with love.
Plums are totally underrated. I admit, I use to underrate them myself. Then, things changed when I first devoured a farmer's market plum-- which did not happen until last year. In a previous post, I mentioned that I have become a crazy-canning lady. So crazy, I even started canning plum jam after I experienced a farmer's market plum last year.
This year, whoa, plums have jumped up a whole big notch in my book. At a recent farmer's market trip, I visited a stand that specializes in peaches-- they were delicious. After purchasing a small bucket of peaches, I was one heel turn away from booth hopping, when I overheard a conversation between the booth owner and a customer. The booth owner told the customer to take a look at the sliced-sample plums, and then a look at the whole plums. I looked, and I couldn't believe what I was seeing.
This is how the exterior of the plum looks: they fall harsh on the pale side. * Note: objects on camera may appear bigger than their actual size (the plums look like the size of a racket ball here, but they more accurately reflect the size of a ping pong ball).
This is how the interior of the plums look. If oranges are labeled blood oranges when the interior is highly pigmented, then I think these should be called blood plums... Ok, maybe not. Frankly, I don't quite favor the name "blood oranges." I don't recall ever trying them, and I don't think it'll be easy to after seeing its appearance on Dexter, episode after episode.
Anywho, the booth owner explained that they are Japanese plums. He said back in the day, they did not care about the color of the skin, thus the surface color doesn't look appealing. As you can see, the inside totally looks like it came from some other kind of plum with a beautiful outside.
These plums are so delicious, they are the best plums I've ever tasted. Sometimes I like to eat the skin, sometimes I don't. With these, definitely skin! Even when they are ripe they have a nice crisp bite to them. They are very juicy, very sweet, and very good tasting! I got a small container for $3.00. The pit is very small so you get a lot of meat to work with.
See, very small, and that's not even getting to the core of it yet! Moral of the story: don't be deceived by the outside of a plum if you haven't seen or tasted the inside: don't judge a plum by the color of its skin!


 "Pin It")


 "Pin It")

 "Pin It")

 "Pin It")


 "Pin It")

 "Pin It")


)